PENTAIR FULLFLOXF
- Lubricate the cover o-ring with silicon o-ring grease and place it on the cover flange. Install the cover and diverter shaft in reverse order of removal from the valve body. If the diverter shaft was removed from the cover, make sure the two o-ring (spacer goes between o-rings) are in place and lubricated with silicon o-ring grease.
- Align the notch (on cover) and tab (on valve body) this will position the top cover molded name “INLET” over the center or “common” port as shown in Figure 3. Make sure the cover and valve body screw holes are aligned.
- Install the twelve (12) cover screws. Using a No. 2 Phillips screwdriver, torque the screws sequentially to 36 lb*in (4.1 N*m). using the crisscross tightening sequence shown in Figure 4.
- Mount the handle onto the diverter shaft (the handle is keyed to fit on the shaft in only one position).
- Install the handle lock screw and finger tighten to secure in place.
- Manually verify that the diverter valve rotates smoothly in both directions
To install the check valve top cover
- Make sure the cover o-ring is lubricated with silicon o-ring grease and installed on the cover flange. Mount the check valve cover on top of the body with the flapper oriented in same position as when removed. Align the notch (on cover) and tab (on valve body).
- Make sure the cover and valve body screw holes are aligned.
- Install the twelve (12) cover screws. Using a No. 2 Phillips screwdriver, torque screws sequentially to 36 lb*in (4.1 N*m). using the tightening sequence shown in Figure 6. Verify that the check valve flapper is oriented in the proper direction.
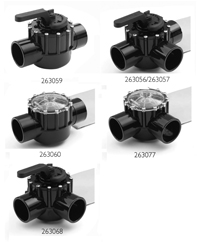
- Valve available in CPVC for maximum heat resistance.
- Maintenance-free PTFE composite diverter seal.
- Optimum positive-seal
- Maximum Flow Rate, low head loss
- Chemical-resistant
- Used for diverting, shut-off or mixing applications
- Accepts 2-1/2 in. and 3 in. PVC plumbing
- Field-adjustable stop positions
- Designed to work with most industry standard actuators


